You are currently browsing the Engine Communications posts tagged: food


Christmas with Our Kitchen

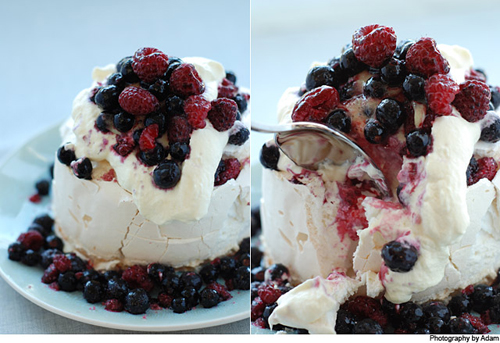
Pavlova_main-image

Once again, we have been blessed with another post from our friends from Our Kitchen, over in New Zealand. This time the recipe is for one of their Christmas specialties ~ Pavlova.

Susie from Our Kitchen writes:

Pavlova is an iconic Kiwi dessert, well, if you believe us New Zealanders and not our counterparts across the ditch in Australia.  It’s probably one of the more versatile desserts I know of.  It can be served in hot or cold weather, can make the grade for special dinners but can also be served up at a low key barbeque.

Typically the meringue dessert is slathered in cream and then decorated with slices of kiwifruit.  But I know and have seen many other ways to garnish it.  It’s definitely a dessert we savour at Christmas time, and since Christmas time marks the beginning of summer for us here in New Zealand we like to garnish it with fresh berries.  I definitely recommend having a try at it and getting a taste of an antipodeans Christmas.

Hope you guys have a fantastic festive season!

Traditional Kiwi Pavlova

Serves 4

  • 3 egg whites
  • 1 cup caster sugar
  • 1 tsp vinegar
  • 1 tbsp cornflour
  • 1 tsp vanilla essence
  • Fresh Berries
  • Whipped Cream for topping

Method

1. Preheat your oven to 150°C on bake, if you would like to use a fan function for that extra crispy coating use a lower temperature like 125ۦC*.

2. Line a baking sheet with baking paper.

3. Beat the egg whites on a high setting until stiff peaks form. To make you sure your egg whites whisk up nicely ensure there is no egg yolk in them and that all the utensils and bowl have been rinsed in scalding hot water to remove any grease.

4. Add sugar gradually whilst still beating on a high setting, usually a tablespoon at a time is the norm or if you have steady hands pour in a slow steady stream, making sure at each addition it is beaten thoroughly.

5. Once all the sugar is added beat for a further 10 minutes. This is important as it helps the mix to stiffen a little more, which will mean it will keep its shape when it’s baked.

6. Mix together the vinegar, cornflour and vanilla essence, decrease the mixer setting to med-low and add in the cornflour mix. Once just mixed in, turn off mixer.

7. Cut a ~40cm length of baking paper and fold along its length. Curl on tray to make a cuff with a diameter of ~17cm, either tape or pin it to keep its shape.

8. Spoon meringue mix into cuff and smooth out surface. Place into the middle of the oven, if on bake turn the oven down to 125°C and bake for one hour. After an hour turn the oven off and let the pav cool in the oven. For fan functions do everything the same just turn the oven a little lower, maybe 115°C.

Hull and wash some berries, whip some cream and serve! You can also opt for the sliced kiwifruit.

Tips and Tricks

  • Using a fan function forces convection currents and dries out humidity that the more gentle bake function has, which is why you’re likely to get more of a crust on the pavlova using a fan function. Because of the forced convection, fan functions transfer heat and energy quicker than bake, thus the golden rule of baking is to decrease the baking temperature by roughly 20°C when using them.

Thanks again for sharing Susie, from all of us at Engine, we wish you and your F&P team a Merry Christmas and a prosperous New Year! 

For more recipes from the team at Our Kitchen, make sure to visit their blog. Connect with them on Facebook and Twitter too!

Cheers,

Kerry

Holiday Entertaining 101 – Part 4

The countdown is on!

All right, so over the past few Friday’s I have been talking about planning the perfect party, and I think that we are all ready to graduate to the next step, the best step, and the yummiest…preparing food for the party. This post is strictly about food, and honestly, I can’t think of anything better! 

A few weeks ago I posted a recipe for meatballs, other items on my Christmas Party Menu would include:  

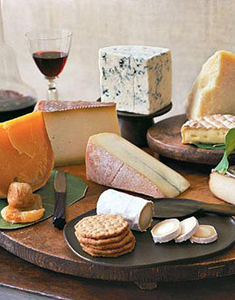
Assorted cheeses paired with fruit and crackers.

Assorted cheeses paired with fruit and crackers.

Assorted Cheese Platter with Fresh Fruit, Bread & Crackers 

It doesn’t get much easier than putting an assortment of cheeses together on an old wooden platter or a piece of slate. Tip: make sure you represent cheeses from different parts of the world, such as France, Italy, Greece, and of course, don’t forget your local artisian cheese factories. Make sure that you have representation from each style of cheese. Some examples: hard (parmesan, Romano, Asiago), semi-hard (Cheddar, Gruyere, Gouda, Jarlsberg), semi-soft (American Brick, Havarti, Buffalo Mozzarella) and soft (cream cheese, ricotta, brie, bleu, Roquefort). 

It’s also a good idea to purchase cheeses that are close to their “best before” date, as they are at their peak flavor. 

Pair cheeses with: sliced pear & apple, grapes, figs, chutney (I just love extra old cheddar and red pepper jelly) and lets not forget, a variety of crackers and bread. 

Putting a name to the face is very helpful! If you’re using slate you could write the names of the cheeses and where they are from in chalk. Or you can use the standard cheese spikes. 

Tip:  Take cheeses out of fridge about an hour prior to serving – cheese should be at room temperature to get full flavor. 

Smokey Bacon Bites – I found this Rachael Ray recipe online last Christmas ~ now a regular in my lineup of appis ~  super easy and very tasty! 

  • 1 tbsp olive oil
  • 1/2 pound bacon, chopped into small pieces
  • 1 large onion, finely chopped
  • Pepper
  • Flour for dusting
  • 1 sheet puff pastry dough (13×10”), defrosted
  • 1 six ounce container herb & garlic cheese like Boursin
  • 1 cup Swiss cheese, shredded. 
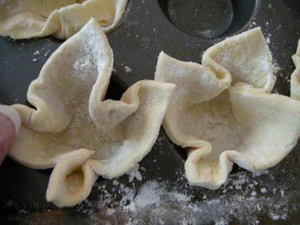
Puff Pastry

Puff Pastry

Preheat oven to 400F. Place a medium-sized skillet over medium-high heat, add olive oil. Once hot, add the bacon and cook until crispy, about 5 min. With a slotted spoon, remove the bacon from the skillet to a paper towel-lined plate. 

Remove all but 2 tbsp of the fat from the skillet, return to the heat and add the onion and cook until tender. Remove from heat and combine with the bacon. Season with some pepper and let cool. 

Lay the pastry dough out on a nonstick sheet. Spread the Boursin cheese evenly over the dough then top with the bacon-onion mixture and sprinkle with cheese. 

Transfer to the oven and bake until golden brown and cooked through, about 20 min. Once the dough is done baking, let cool and cut into 1-2 inch squares. (Makes about 35 pieces.) 


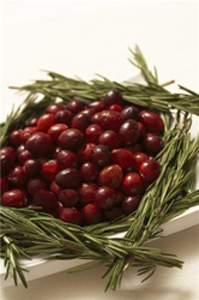
Christmas just isn't the same without cranberries!

Christmas just isn't the same without cranberries!

Cranberry Brie Puffs ~ Christmas without Cranberries, come on…?  

  • Half of a 397 ml pkg of frozen puff pastry
  • 1 cup fresh cranberries
  • 1/4 cup water
  • 3 tbsp sugar
  • 1/4 cup all-purpose flour, for flouring work surface
  • 6 oz brie, rinds removed, cut into 24 equal pieces
  • Fresh rosemary for garnish

 Thaw pastry at room temperature for about 1 hour or until soft enough to roll out. Preheat oven to 400F. Put the cranberries, water and sugar in a small saucepan. Cook, covered, over high heat for

2-3 min or until cranberries have popped. Remove lid and stir to mash. Reduce heat to medium and continue cooking until the mixture has thickened and liquid has evaporated. Cool. 

Sprinkle work surface with flour and roll out puff pastry into a 12 X 9 rectangle. With a pizza cutter, cut the dough into 24 equal rectangles. Press pastry into mini-muffin pans (two pans with 12 cups each). Divide cooled cranberry mixture among the muffin cups. Put a piece of Brie in each cup. Bake puffs for 15 – 20 min. or until puffed up and golden brown. Sprinkle chopped rosemary over tops and decorate serving platter with extra sprigs. Serve warm. (Makes 24 pieces.) 

To be continued next Friday… along with a guest post from our friends in New Zealand! 

Cheers,

Kerry
Holiday Entertaining 101 – Part 3

glasswear

Beautiful glassware presents your holiday cocktails as presents all their own.

Here’s the skinny on setting up the Perfect Bar! 

Very important – make sure your bar is completely set up before your guests arrive

• Ice & lots of it ~ running out of ice isn’t cool!

• Shot glass or jigger for measuring

• Strainer for chilled drinks without the ice

• Pitcher for mixed drinks with long handled spoon for stirring

• Shaker set for those “shaken, not stirred” cocktails

• Small cutting board (bar board) and paring knife for cutting lemons and limes

• Cocktail napkins

• Swizzle sticks

• Bottle opener

• Corkscrew

It’s not always possible but having a designated bartender is a bonus and takes some of the pressure off of the host. 

HELPFUL HINTS: 

  1. Don’t stick to lemons and limes for garnishes. Set out bowls of cranberries, raspberries, star fruit, vanilla beans, lavender, lemongrass, chocolate swizzle sticks, flowers, olives, pickles, etc. 
  2. If fridge space is limited use your deck, porch or balcony! 
  3. Offer some low-carb and low-cal beverages, such as light beer or light coolers. 
  4. Serve both plain and sparkling water and lots of non-alcoholic choices. 

Gorgeous glassware is must! I don’t know about you, but my red wine just doesn’t cut it when it’s served to me in a plastic glass (go “green” and use glass not plastic, rent or borrow from family or friends if you have to). Go above and beyond and serve beer in a tall pilsner glass – adds a touch of class (unless your guests specifically request their beer in a bottle).

 Make sure that you have enough glasses for everyone, usually two per guest for each type of drink you will be serving. Why not write the names of guests on holiday gift tags, tie them to the stems of the glasses as you hand out the drinks. OR, as Rachael Ray recommends, use a china marker and write the names directly on the glasses.

eggnog

Easy Homemade Eggnog

 12 large eggs

1 1/2 cups granulated sugar

3/4 tsp salt

12 cups Homogenized milk (for richness, some recipes call for whipping cream so this isn’t so bad!)

3 tbsp Vanilla

2 cups Brandy

1/2 cup rum

Ground nutmeg

 Beat eggs in extra large bowl until light. Continue beating while adding sugar and salt gradually. Beat until sugar is dissolved. Add milk and vanilla. Add brandy and rum. Adjust strength by increasing or decreasing liquor. Stir. Can be refrigerated for up to 24 hours before serving, or stored covered for 6 days. To serve, run immersion blender through to foam. Garnish with nutmeg. Makes 28 servings.

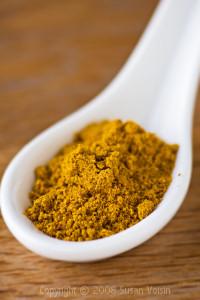
curryCurried Nuts ~ so easy, and a great addition to any bar! 

1/4 cup butter

1 tsp medium-hot curry powder (curry flavor is not too strong, adjust as desired)

1 tsp salt

Dash or two of Worcestershire sauce

4 cups of mixed nuts (pecans, almonds, peanuts, walnuts, cashews etc.)

Melt butter in large saucepan. Stir in curry powder, salt & Worcestershire. Sauté until fragrant. Add nuts. Stir to coat. Turn into ungreased roasting pan and bake in a preheated (325 degrees) oven 10 – 15 minutes. Stir occasionally while baking. Cool then store in an airtight container.

curry1Check out our Facebook Fan Page for more holiday entertaining tips. We have the skinny on all the cocktail trends for 2010, and we’ll be posting more holiday recipes as we head closer to Christmas.

Holiday Entertaining 101 – Part 2

To continue what I stared last week ~ Holiday Entertaining 101

Candle+burning

Whether you are throwing a big bash or small intimate dinner party, the keys to success are: ORGANIZATION, PLANNING & PRESENTATION. Keeping that in mind, the planning process shouldn’t stress you out, and doesn’t need to come with an expensive price tag. Having fun and enjoying the whole process from start to finish is just as important, otherwise, why bother!

WHAT – Pick a theme (Christmas Cocktail Party, Dinner Party, Skating Party etc.)
WHEN – Choose date and time of party.
WHERE – Is the party inside, outside, at your home, hall etc? Provide address and directions if necessary.
WHO – Guest list! Who do you want to invite to your party? TIP: it’s a good idea to call ahead and speak with the key people on your list just to make sure that they can attend. Once you have their commitment you can seal the date and time, then get invites out (I covered invitations in this post).
HOW – What can you afford to spend? Budget, yes, I know it’s hard, but try to stick to it.

HELPFUL HINTS (I tried to keep it to 10, no such luck, sorry!)

  1. Lists, you can never have enough of them. Guest lists, Menu Lists, Drink Lists, shopping lists. (I just love crossing items off my list–it makes me feel like I have actually accomplished something!)

  2. Always pick recipes that are tried, tested & true. Not a good idea to use your holiday guests as guinea pigs. Confidence in your menu choices is a must!

  3. Shop early – this will allow you to take advantage of supermarket sales and spread the cost out over time.

  4. Set a gorgeous table or buffet and include a unique centerpiece. You don’t have to limit yourself to flowers, see what treasures you have around the house (what about the pine cones that have fallen on your front lawn, or a glass vase filled with simple shinny red Christmas balls).

  5. Candles and lots of them. Candlelight is the kindest light of all ~ warm, cozy and inviting.

  6. Plan to have a variety of nonalcoholic drinks on hand. Always buy more than you think you’ll need.

  7. Lots of Ice, you can never have too much, and buy the day of the party.

  8. Your porch or garage makes an awesome fridge.

  9. Make sure that your bar is set up before guests arrive, music play list has been selected and music is playing when your first guests arrive.

  10. Hosts are dressed & ready prior to guests arriving! Give yourself enough time to get ready ~ have a cocktail to ease those pre-party jitters, relax and have a fabulous time, as I’m sure everyone else will!

Next week, setting up the Perfect Bar…

In the meantime, get started with this easy party recipe.

holidayfoodEasy & Elegant Holiday Hors D’oeuvres

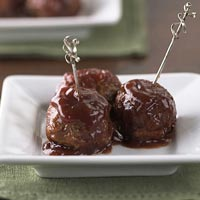
Cranberry-Glazed Cocktail Meatballs
     ~ One of my old favorites from Food & Drink, Holiday 2004

Olive oil for brushing meatballs and baking tray
3/4 lb ground pork
1/2 cup chopped Italian parsley
2 cloves garlic, minced
One 1″ slice French bread, crusts removed, soaked in water and squeezed dry
1/2 tsp 5-spice powder
1 large egg, beaten
Salt & freshly ground pepper
Cranberry Glaze
 
1/2 tsp olive oil
 1 clove garlic, minced
1 tsp chili paste (cut in half if not keen on spice)
1/4 tsp sesame oil
3/4 cup canned jellied cranberry sauce
4 tsp soy sauce
1 tsp honey
1 tsp oyster sauce
1.  Preheat oven to 400 and brush a baking sheet with oil.
2.  In bowl combine pork, parsley, garlic, soaked bread, 5-spice powder, egg and salt & pepper. Mash together with hands and mix well. With wet hands roll mixture into 24 balls, about 1″ each. Place balls on baking sheet and brush with oil. Bake meatballs 15 mins, flip them over. Turn on broiler and continue cooking for 5 to 10 minutes or until crispy and done.
3.  Cranberry Glaze – heat olive oil in small saucepan over medium-low heat. Add garlic and cook for about 5 min or until softened but not browned. Whisk in chili paste, sesame oil, cranberry sauce, soy sauce, honey and oyster sauce. Simmer 2 – 3 min.
4.  Remove meatballs from oven and transfer to a large bowl. Pour glaze over meatballs and toss to coat. Skewer balls on a cocktail pick or toothpick and place on a platter. Serve warm.
You can make the meatballs ahead of time and freeze, then all you have to do is make the glaze, heat meatballs and serve.

Happy Friday,
Kerry

Greetings from New Zealand

As promised, we have collaborated with a brilliant team of food bloggers from across the globe; I hope that you are as excited as I am, I consider this to be a true honor ~ Thanks Our Kitchen!

Emma, from Our Kitchen writes:

The 5 of us here at Our Kitchen would like to extend a warm springtime hello from New Zealand to all the readers of Friday’s with Kerry. We are very excited to have the chance to collaborate with the team at Engine Communications and we hope that you enjoy the recipes that we will contribute over the next month. Have a fantastic festive season!

Dunedin Team

Dunedin Team

Sara and Emma

Sara and Emma

The team at Our Kitchen is made up of a group of passionate foodies (Sara, Lauren, Adam, Susie and Emma) here at Fisher & Paykel who are excited to share their stories, experiences and skills. Team members have varying backgrounds and interests in food resulting in a blog and a collection of recipes, which appeal to a wider audience, from chefs to the home cook and everyone in between.

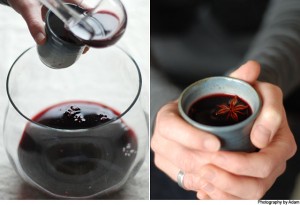
Mulled Red Wine (yields 6-7 glasses)

by Susie

Mulled Red Wine

Mulled Red Wine

1 bottle 750ml of medium quality shiraz or merlot
3 cinnamon quills
10 cloves
5 star anise
2 slices of fresh ginger root
10 dried pomegranate seeds (optional)
1/2 – 3/4 cup brown sugar
1 cup water
2 oranges

Method

1. Add the wine and all other ingredients to a medium-sized saucepan.

2. Carefully peel half of one of the oranges. Try as much as you can to avoid the pith as this will create a very bitter flavour. Juice both oranges and add this along with the peel into the wine mixture.

3. Gently bring the pot up to heat just below a simmer on medium-high setting on your cooktop, then reduce back so as to only gently warm the wine. Warm for 20-30 min to let the spices infuse.

4. Remove from heat, strain and serve. Alternatively, strain and store so you can heat it later and drink at your leisure.

Thanks so much for sharing Emma, we can’t wait to give this one a try! Looking forward to next week’s recipe.

The original post on the Our Kitchen Blog is here.

‘Tis the Season

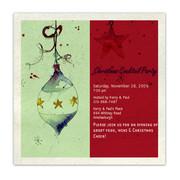
Example invitation designed on MyPunchbowl.

Example invitation designed on MyPunchbowl.

With Hallowe’en behind us, it’s now time to focus our energy on the next big event.Yes, you’ve got it, Christmas!

It’s hard to believe that our local Santa Clause parade is right around the corner. That signifies to me that it is officially time to start thinking about decorating, buying that special gift for everyone on your list (I’m definitely not one of those early shoppers), and yes, one of my most favorite things, party planning and holiday entertaining. 

One of the most important tips I can give for planning a holiday party, is to plan ahead. Party schedules during the month of December are usually pretty hectic, making it crucial to get that invite out early enough, especially if you want your party to be a success. I have to admit, I’m a big fan of getting a hard copy invite sent in the mail, but if you’re in a pinch, online invites are the way to go. 

My fan list starting with my favorite:

  1. MyPunchbowl  
  2. Paperless Post
  3. Evite

More creative control is a total bonus with MyPunchbowl. You can pick from multiple fonts, change colors and shadings, add images, and play with placement of the text. You also have the option to add the event to your online calendar, iCal, Outlook, Google or Yahoo calendars. Neat!

If social media is your thing then you can post your event on Facebook, Twitter or your blog. Doesn’t get much easier than this does it?

If you’re in a panic to get that invite out ASAP, then Evite is quick and easy to use. Paperless Post has an elegant, more formal style of invites to choose from, also fairly easy to create and send, slightly confusing when checking out the details. 

Next step ~ menu planning, including cocktails and beverages – stay tuned for next Friday’s post. 

On another note, Bryna has been talking about collaboration, and over the next few weeks we will be teaming up with foodies from all over (even as far as Auckland, New Zealand), to plan a festive holiday feast.

The lovely, talented, Holly Fillmore.

The lovely, talented, Holly Fillmore.

Today I thought that I would share a recipe from Holly (Fillmore’s wife and baker/blogger extraordinaire). These cookies, accompanied by a thermos filled with hot coco and a warm blanket, will make you sing to the tune of Jingle Bells while eagerly anticipating Santa’s arrival at the parade! 

Holly writes: 

One way we celebrate Christmas in our home is by baking cookies and other delicious goodies. Many of these tasty treats are only made and enjoyed at this special time of year (it seems more of a treat that way). I usually try to make each family member’s favorite treat, and then a few more on top of that. I start baking early and store what I can in the freezer (I try to keep it a secret until December or else it all disappears). 

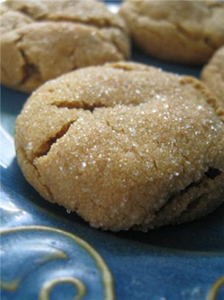
The Sparkling Ginger Cookie is a real crowd pleaser. I can’t count how many times I have had others rave about this actually very simple and super easy cookie! 

Ginger Sparklers (photoography by Holly)

Ginger Sparklers 

  • 3/4 cup butter or margarine, softened
  • 1 cup white sugar
  • 1 egg
  • 1/2 cup molasses
  • 1 cup whole wheat flour
  • 1 1/2 cups all-purpose flour
  • 2 tsp baking soda
  • 1 1/2 tsp ginger
  • 1 1/2 tsp cinnamon
  • 1/2 tsp salt
  • White sugar, for rolling 

In a large sized bowl, cream margarine and first amount of sugar well. Beat in egg. Mix in molasses. In another bowl mix together dry ingredients; flour, baking soda, ginger, cinnamon and salt. Add to creamed mixture. Mix well. Shape into 1inch balls and roll in sugar. Bake at 350 for approx 8 minutes. *For a chewy cookie, remove from oven a little early, the longer they cook the crispier they will be. 

Cheers & Happy Holiday Planning!

Kerry

Ghosts & Goblins Go Green!

hallowblog1Why didn’t the skeleton cross the road?

He didn’t have the guts.

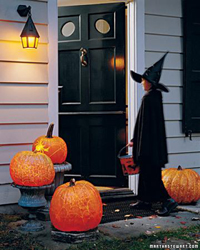
I just love Hallowe’en; the decorations, the smell of roasted pumpkin seeds, gooey mushy pumpkin guts, the doorbell ringing followed by the chorus of “trick or treat,” and of course the pillowcase that is overflowing with yummy treats and treasures!

So what’s the buzz this year? I would have to say it’s all the talk about ‘Green Hallowe’en.’ 

Green Hallowe’en is a non-profit, grassroots community initiative to create healthier and more earth-friendly holidays, starting with Hallowe’en. 

Canadians spend over $1.5 billion on candy, costumes and decorations each year for Halloween.  Most of these products will be used once and then thrown away. 

I’m all for a greener Hallowe’en–lets just make sure that we don’t take all of the fun out of it!

Here are my top 5 tips on how you can start to contribute to a “Greener Halloween.”

(We might be a bit late for this year, but let’s keep it in mind for next.) 

  1. Once you have carved your pumpkin, keep the seeds for roasting and don’t forget about the flesh (can be used in soups, pies, breads and casseroles). Compost the remainder of the pumpkin that isn’t used, same goes for the carved pumpkin after Halloween. (You can also compost leftover candy as long as you take it out of the wrappers.)
  2. Have kids use pillowcases–just like the good ole’ days–not the store bought plastic bags (pillow cases hold more anyways!).
  3. Instead of buying new Halloween costumes, try to use what you currently have at home. Go through your closets and drawers to see what you have, you’ll be surprised what your imagination can come up with, or host a costume exchange, or rent a costume.
  4. Purchase organic or fair trade treats, or buy locally produced treats from local merchants. Buying locally supports your economy, and also reduces fuel consumption and pollution associated with transporting products. In Belleville we’re lucky to have the best chocolate around, Donini Chocolate . You could also hand out non-food items  (just make sure that they are fun, like seed packets).
  5. When decorating, try to reuse last year’s decorations. Ask yourself, do I really need to buy new or more, or you can try to make your own. If hosting a party, avoid disposables like napkins, plates, cups, tablecloths etc. 

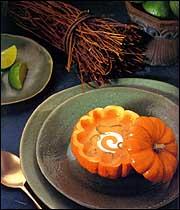
If hosting a Green Hallowe’en dinner party, this soup is so full of flavors it just might wake the dead. Make sure that you buy two cans of coconut milk so that you can use one to make some creepy cocktails for before or after dinner! 

hallowblog2Pumpkin and Coconut Curry Cream Soup 

  • 2 Tbsp butter
  • 1 cup finely chopped onion
  • 1 large clove garlic pressed
  • 1 – 540 ml can pure pumpkin (not pumpkin pie filling), about 2 cups
  • 2 cups chicken stock
  • 1 can coconut milk (or 1-cup, just don’t use low fat version, not as much flavor)
  • 1 tsp grated fresh ginger
  • 1/2 tsp ground cumin
  • 1/2 tsp turmeric
  • 1/4 tsp ground cinnamon
  • 2 tsp curry powder or curry paste
  • Salt for seasoning
  • Freshly ground pepper to taste
  • Pinch of cayenne to taste 

Melt butter in a large pot over medium heat. Cook onion and garlic 5 minutes, until softened. Add curry powder, cumin, turmeric, cinnamon, cayenne, ginger, and pepper, toast the spices, stirring constantly for 1 min. or until fragrant. 

Add broth and pumpkin puree, mix well and bring to a simmer. Simmer 10-15 min. Add coconut milk and heat through, without letting it come to a boil. Season soup with salt and pepper. Serve in hollowed out mini pumpkins and garnish top with pumpkin or sunflower seeds. 

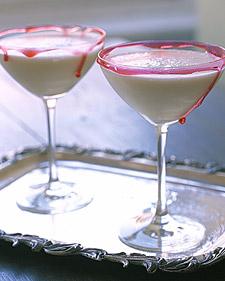
hallowblogPina Ghoulada (Martha Stewart)  

Serves 10 to 12 

FOR THE “BLOOD”
  •     3 tablespoons corn syrup
  •    1/4 tsp red food colouring
FOR THE DRINK
  •     20 ounces pineapple juice
  •     1 can (15 ounces) cream of coconut
  •     1/2-cup heavy cream
  •     1 cup orange juice
  •     10 ounces good quality rum
Directions 
  1. Pour the corn syrup in a shallow bowl. Dip a toothpick into the food coloring, and stir a very small amount into the syrup to combine. Hold a glass by the stem, dip rim into the syrup mixture, and turn glass, coating entire rim. Turn the glass upright, allowing mixture to drip down sides. Dip the remaining glasses. Set aside.
  2. Whisk together drink ingredients. Place 2 1/2 cups ice in a blender, and add 1-cup drink mixture. Blend until smooth; add more pineapple juice if mixture is too thick. Repeat with remaining ice and mixture. Carefully pour into prepared glasses; serve. 

Enjoy and Happy Haunting!

The Finish Line!

100 Mile eating can be really amazing with a little extra effort in the kitchen.

100 Mile eating can be really amazing with a little extra effort in the kitchen.

Well, here we are, day five of our 100 Mile Diet Challenge, and boy am I ever craving a hot cup of coffee on this cold damp morning! Five days of hot apple cider is getting a bit much, and quite frankly, I’m not to fond of the herbal tea that I bought – YUCK!

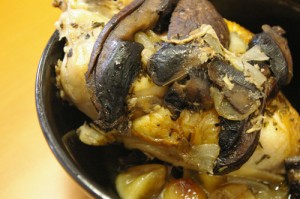
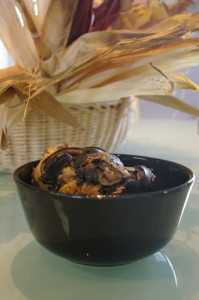
On the up side, I feel that I have eaten pretty well this week–all local and quite yummy! Last week I didn’t include a recipe so I thought that I better step up to the plate this week. This is a recipe that I prepared during the challenge, and shared with my colleagues at Engine.

Roasted Chicken with a Butter & White Wine Sauce
  • 2 Chicken breasts ~ skin on (if you want flavor that’s where a lot of it comes from)
  • 1 Small onion ~ quartered, then quartered again
  • 4 Cloves of garlic peeled and cut in half
  • 1 Portobello mushroom, sliced (Wellington Mushroom Farm)
  • 1 slice of bacon chopped
  • 1/2 tsp of dried French Thyme (Vicki’s Veggies)
  • 1/4 cup of white wine (from one of our many local wineries in the County)
  • 1/4 cup of homemade chicken stock
  • 2 tbsp of butter (Stirling Creamery)

Happy eating!

Happy eating!

Heat oven to 375, place chicken in baking dish or stoneware, put cut veggies, garlic and bacon around chicken, sprinkle everything with the thyme, mix wine and stock together and pour around chicken. Bake for about 40 min., put a tbsp of butter on each piece of chicken and broil for the last 5 – 10 min., the butter will melt over the chicken, helping it to brown and then mix with the wine and stock sauce. Once beautifully browned, remove from oven and serve with hot buttery wine sauce. Garnish with fresh parsley.

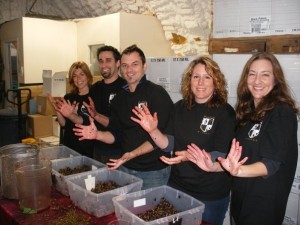
Serve with a Chardonnay from Black Prince Winery where yesterday, we took part in a grape crushing challenge (which Shaun won), and a wine tasting.  Thanks to the folks at Black Prince for their hospitality and fun!

Hint:  if not taking part in the 100 Mile Diet Challenge, I would use sea salt and fresh black pepper to season the chicken as well. This is truly the hardest part for me, I am a salt freak and it REALLY does enhance flavor!

Enjoy!

A special thanks to the crew at Cogeco for a great week! Mike, Anne–you made us think local, get engaged and you helped us have fun doing it. We really appreciate all your hard work. Thanks to Chris at the Milford Bistro–you’ll be getting a visit from the whole team soon, but this time we’ll let you cook. We also appreciate the warmth and hospitality of Kerry and Rod at Black Prince Winery. We had so much fun with you! It’s been a great week. Hope you enjoyed it as well!

Grape-covered hands post-challenge at Black Prince Winery, Picton, Ontario.

Grape-covered hands post-challenge at Black Prince Winery, Picton, Ontario.

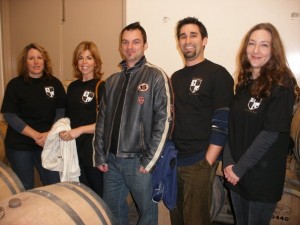
The Engine Team (L-R Kerry, Kathy, Fillmore, Shaun and Kathy).

The Engine Team (L-R Kerry, Bryna, Fillmore, Shaun and Kathy).

Geared Up or Stressed Out?

Our 100 Mile Diet is right around the corner and I’m trying to gear up, but that stress factor is starting to rear it’s ugly head– and we haven’t even started yet! This is going to involve some serious planning and research–good thing I don’t live in the Yukon. Yikes! We are so fortunate that we live in an area that has an abundance of fresh produce, dairy and meat products, all in our backyard, figuratively speaking. 

butter

Isn't this the most gorgeous butter you've ever seen?!

I consider myself someone who tries to do my part and shop locally for the food that graces my table… honest. I buy cheese from our many cheese factories, I ONLY buy butter from the Stirling Creamery (even though I sometimes have to pay more for it). Their butter is ranked as one of the top 30 butters in the world. WOW!

I stop almost daily at Campbell’s Orchards roadside stand to pick up my veggies for the evening (best carrots in town), and of course a few apples. Sometimes I’m down three before I even make it home–they get gobbled up by the kids on the car ride. I buy lavender cooking products from Prince Edward County Lavender  (lavender salt & sugar & Herbs de Provence), mushrooms from the Wellington Mushroom Farm, Maple Syrup from Fosterholm Farms  and lets not forget, ice cream from Slickers

Here’s the kicker, my daily stop at Gilmores Meat Shop & Deli – now this is where it gets tricky. I’m buying from a local butcher, but where does he get his meat from? Oh no, now I have to source meat and poultry from a local farm, this brings a new meaning to this ‘local’ business. Now it’s not stress but withdrawl rearing it’s ugly head! Not only do I buy my meat there, I buy their homemade bread and buns, cookies, squares, pies… must I go on? I’m sure that they are locally made, with local flour and butter and eggs, aren’t they?

roadtripNow this wouldn’t be a post by me if I didn’t make a slight mention about wine or beer, of which I also shop locally. I’ve toured and tasted at the many wineries, always taking home a bottle or two or three. I have yet to tour a local brewery, maybe that excursion should go on my wish list for our challenge?

 Well, I think that I have finally figured it out! This is your classic Ultimate Food Road Trip! Fun, I love road trips. It’s time to hop in the car, take a drive through our beautiful countryside and see what our 100 miles have to offer – want to join me?

We’d love some help here, if you have any tips on local food stops and locations, great finds etc. send us an email, we can use all the help we can get. In the meantime, check out the Harvestin’ the County‘s Locally Grown Map. What an awesome tool! 

Cheers,

Kerry

Kathy Goes Organic

organicWell, next week is going to be a challenging week for us at Engine! We are entered in the 100 Mile Challenge with Cogeco TV – where we can only cook with locally grown and produced foods. When thinking of preparing meals for next week, I realize that so much of what we eat is highly
processed and not at all local!

The big thing for me will be coffee…I need to find a coffee substitute … and quickly!! That got me thinking of calling local health food stores for support. The Organic Underground in Belleville will be a good contact. Also, County Sunshine in Picton is a very good natural foods source, as is Tara Natural Foods in Kingston. I plan on hitting all three shops this weekend to find out more information on local organic products as they usually support local certified organic products from member farms, which have been grown and marketed in a co-operative and sustainable way. Another website which provided very good insight into local organic farming is www.quinteorganic.ca.

I never knew there were so many local organic farms in the Quinte area! Most organic farms are small independently owned and operated family farms of less than 100 acres, and they produce a wide variety of meats and vegetables, as well as healthy organic herbs and teas

If you’re going to go local…why not go organic?

When shopping for organic foods, look for these labels:

organic1organic2